# Drucker Guide - Bizhub c250i
#### Inhalt:
**1. General Information**
**2. Benutzernummern**
**3. Einrichtung von Window**
**4. Einrichtung von neuen MacOS Clients**
**5. Windows Client Konfiguration**
---
### General Information
**Drucker Name:** Bizhub c250i
**Standort:** Schloss 1. OG Flur
**IP Adresse:** 192.168.198.201
**Web Verwaltungs Login:** [http://192.168.198.201/wcd/spa\_login.html](http://192.168.198.201/wcd/spa_login.html)
**Minolta Docs:** [https://manuals.konicaminolta.eu/bizhub-C360i-C300i-C250i/DE/bizhub-c360i-c300i-c250i/index.html](https://manuals.konicaminolta.eu/bizhub-C360i-C300i-C250i/DE/bizhub-c360i-c300i-c250i/index.html)
**Treiber Download:** [https://dl.konicaminolta.eu/de/?productName=bizhub](https://dl.konicaminolta.eu/de/?productName=bizhub)
---
### Benutzernummern:
TRIARGOS: 45841
ALPHA: 26572
EEASER: 73689
FRENOP: 22651
SCHARPF: 33258
---
Einrichtung von neuen Windows Clients:
1\. Suchen nach **Drucker & Scanner**
[](https://docs.alpha-np.de/uploads/images/gallery/2024-03/screenshot-2024-03-26-at-11-51-54.png)
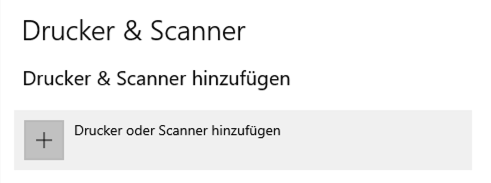
2\. Klicken Sie auf **Drucker & Scanner hinzufügen**
[](https://docs.alpha-np.de/uploads/images/gallery/2024-03/screenshot-2024-03-26-at-11-52-02.png)
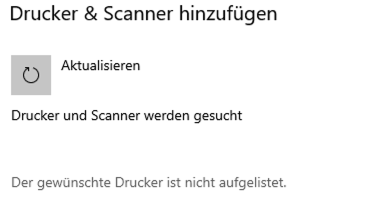
3\. Klicken Sie auf **Der gewünschte Drucker ist nicht aufgelistet**
[](https://docs.alpha-np.de/uploads/images/gallery/2024-03/screenshot-2024-03-26-at-11-52-15.png)
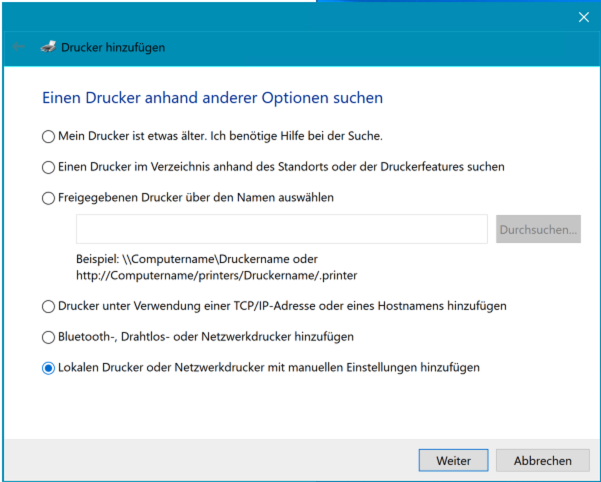
4\. Wählen Sie **Lokalen Drucker oder Netzwerkdrucker mit manuellen Einstellungen hinzufügen** und Klicken Sie danach auf **Weiter**.
[](https://docs.alpha-np.de/uploads/images/gallery/2024-03/screenshot-2024-03-26-at-11-54-47.png)
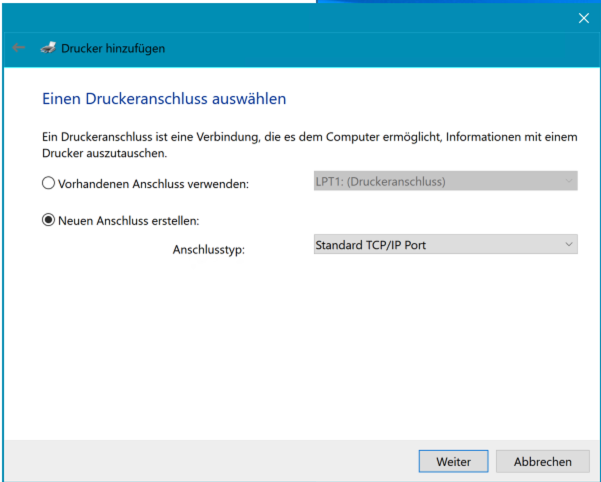
5\. Wählen Sie **Neuen Anschluss erstellen:** Standard TCP/IP Port
[](https://docs.alpha-np.de/uploads/images/gallery/2024-03/screenshot-2024-03-26-at-11-55-00.png)
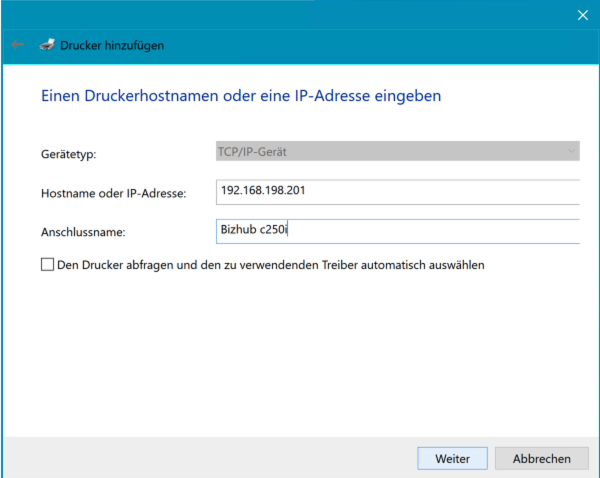
6\. Geben Sie unter **Hostname oder IP-Adresse** die IP-Adresse des Drucker ein. Als **Anschlussname** können Sie frei einen Namen für den Drucker auswählen.
[](https://docs.alpha-np.de/uploads/images/gallery/2024-03/screenshot-2024-03-26-at-11-55-17.png)
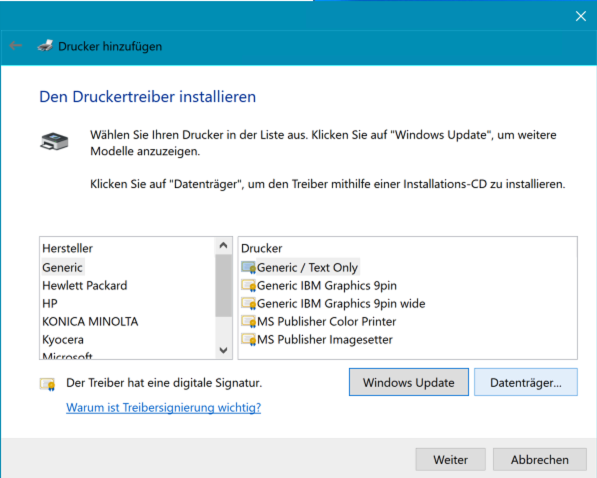
7\. Klicken Sie auf **Datenträger...**
[](https://docs.alpha-np.de/uploads/images/gallery/2024-03/screenshot-2024-03-26-at-11-55-32.png)
8\. Wählen Sie den Druckertreiber aus den Downloads aus. Die Treiber können [**hier**](https://dl.konicaminolta.eu/de/?productName=bizhub) heruntergeladen werden.
Bitte folgenden Treiber herunterladen: UPDPCL6WIN -> In der Tabelle bei "Universal Printer Driver" die aktuellste Version des PCL6 Treibers herunterladen.
[](https://docs.alpha-np.de/uploads/images/gallery/2024-03/screenshot-2024-03-26-at-11-55-44.png)
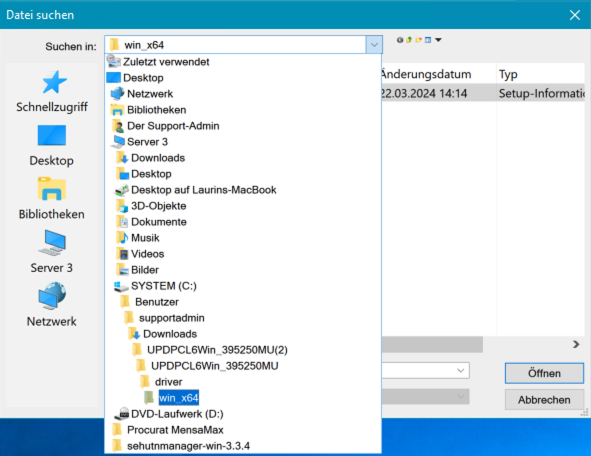
9\. Wählen Sie den angezeigten Drucker Treiber aus und Klicken auf **Öffnen**
[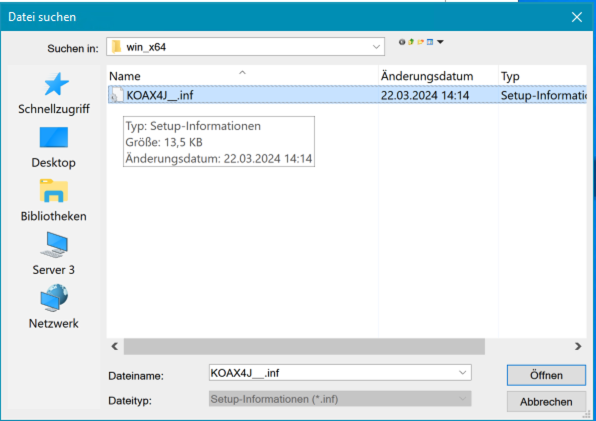](https://docs.alpha-np.de/uploads/images/gallery/2024-03/screenshot-2024-03-26-at-11-55-54.png)
10\. Drucker hinzufügen. Geben Sie unter **Druckername** dem Drucker einen Namen und Klicken danach auf **Weiter**.
**Note!** Unter diesem Namen wird der Drucker bei Ihnen im Druckdialog angezeigt.
[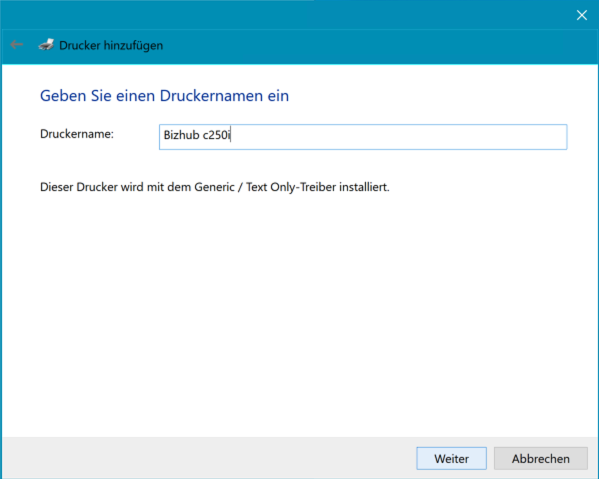](https://docs.alpha-np.de/uploads/images/gallery/2024-03/screenshot-2024-03-26-at-11-56-13.png)
---
### Einrichtung von neuen MacOS Clients:
1. Open **Printer & Scanner Settings** and click on **Add Printer, Scanner or Fax...**
[](https://docs.alpha-np.de/uploads/images/gallery/2024-03/screenshot-2024-03-28-at-09-26-06.png)
2. Type the IP Adress: 192.168.198.201 in the **Adress field.** As Protocol use **AirPrint**.
After that Use the **Select Software...** option to search for the Driver (you can Download it **[here](https://dl.konicaminolta.eu/de/?productName=bizhub)**)
[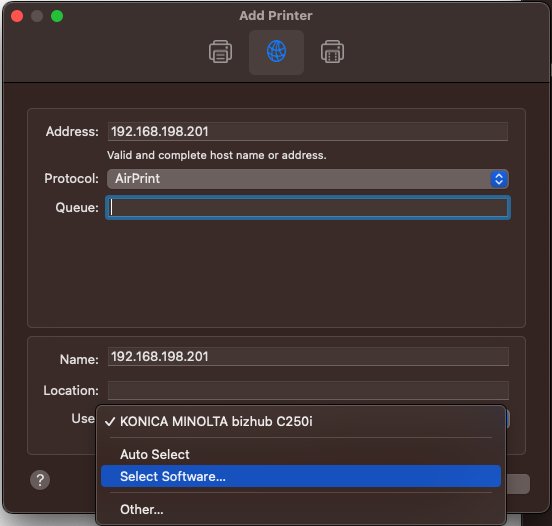](https://docs.alpha-np.de/uploads/images/gallery/2024-03/screenshot-2024-03-28-at-09-26-30.png)
3. Type c250i in the **Search** and select the Driver **KONICA MINOLTA C250i PS**. Klick **OK.**
[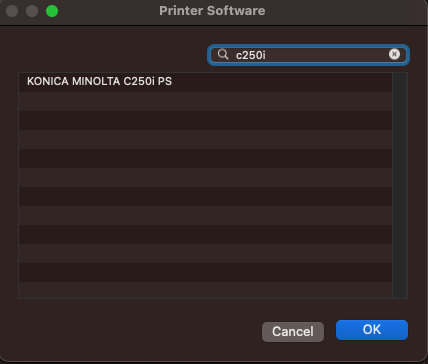](https://docs.alpha-np.de/uploads/images/gallery/2024-03/screenshot-2024-03-28-at-09-26-41.png)
4. Now click **Add.**[](https://docs.alpha-np.de/uploads/images/gallery/2024-03/screenshot-2024-03-28-at-09-26-51.png)
5. Open Preview.app or any other Dokument viewer to reach the Print Options.
Select the newly added Printer **Bizhub C250i** and scroll all the way down to **Printer Options.** Click on the litte **i** on the right side beside **Output Method.**[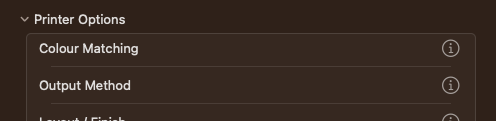](https://docs.alpha-np.de/uploads/images/gallery/2024-03/screenshot-2024-03-28-at-09-28-05.png)
6. Click on **Detail Settings...**
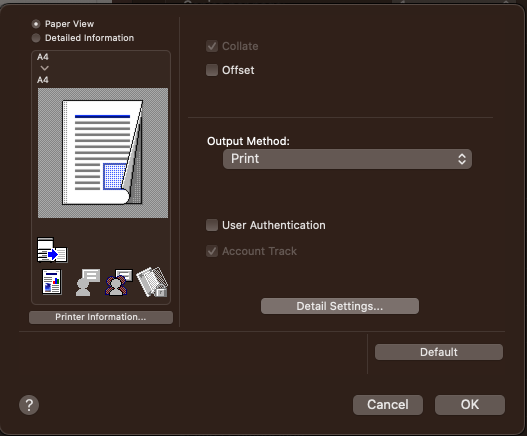
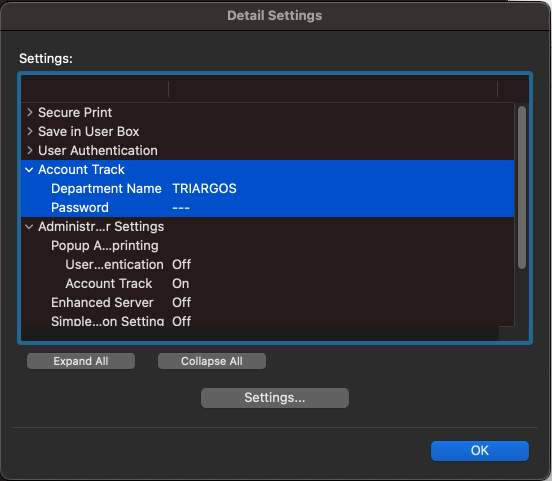
7. Select **Account Track** and when its highlighted click on the **Settings** button in the middle.
[](https://docs.alpha-np.de/uploads/images/gallery/2024-03/screenshot-2024-03-28-at-09-28-25.png)
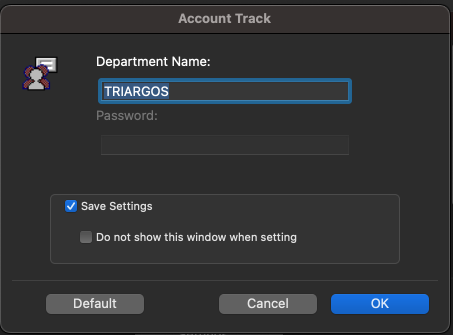
8. Now type in the **Department Name** for us its: **TRIARGOS** and click **OK.**
[](https://docs.alpha-np.de/uploads/images/gallery/2024-03/screenshot-2024-03-28-at-09-28-31.png)
9. Now Select **Administrator Settings** and check the **Account Track** option and click **OK**. [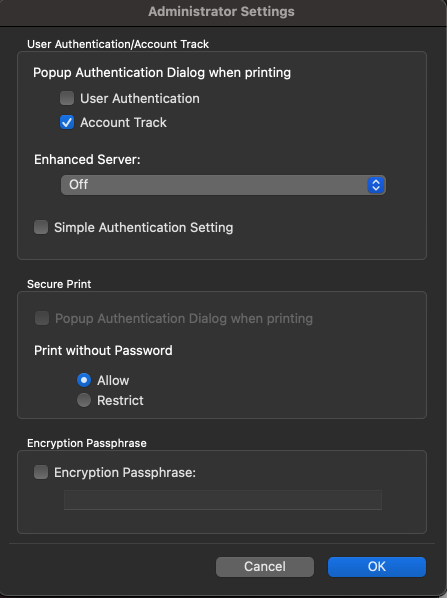](https://docs.alpha-np.de/uploads/images/gallery/2024-03/screenshot-2024-03-28-at-09-28-41.png)
10. Have fun! Now you can Print. It will ask for the Password whenever you try to Print something.
---
### Drucker Konfiguration
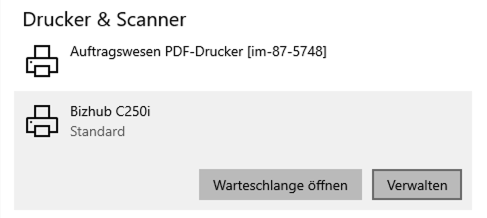
1\. Öffnen Sie **Drucker & Scanner** und wählen Sie den soeben angelegten Drucker **Bizhub C250i** aus.
Klicken Sie auf **Verwalten**
[](https://docs.alpha-np.de/uploads/images/gallery/2024-03/screenshot-2024-03-26-at-12-07-09.png)
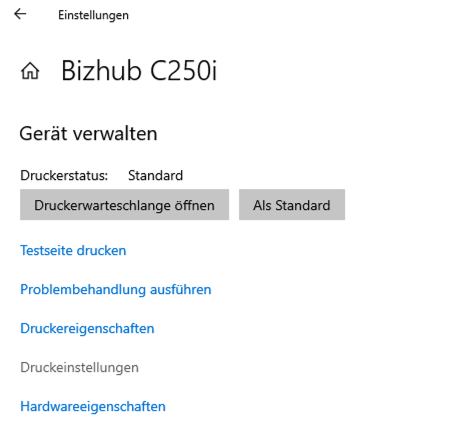
2\. Öffnen Sie die **Druckereinstellungen**
[](https://docs.alpha-np.de/uploads/images/gallery/2024-03/screenshot-2024-03-26-at-12-07-24.png)
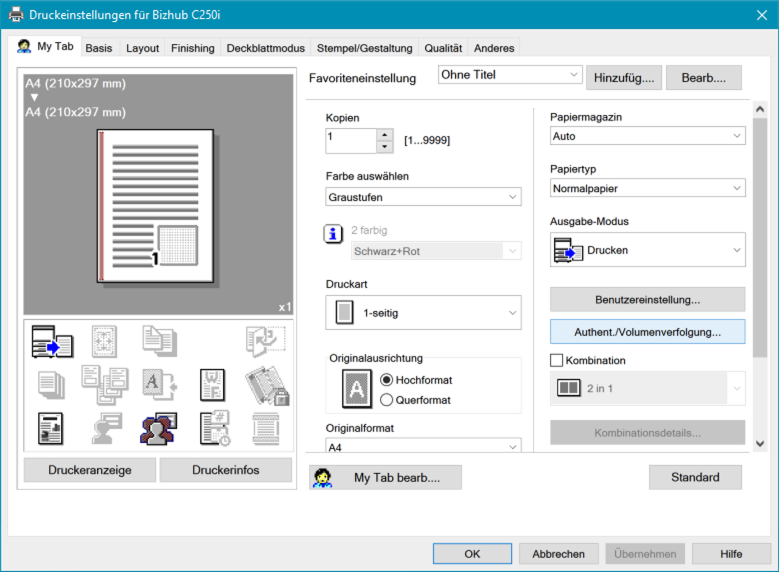
3\. Wählen Sie unter **My Tab** den Button **Authent./Volumenverfolgung...**
[](https://docs.alpha-np.de/uploads/images/gallery/2024-03/screenshot-2024-03-26-at-12-10-47.png)
4\. Geben Sie unter **Volumenverfolgung (E.K.C)** im Bereich **Kennwort** die Benutzernummer der jeweiligen Firma ein und Klicken auf **OK**
[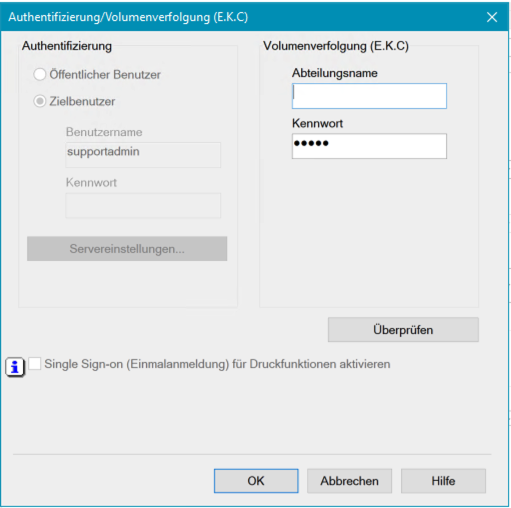](https://docs.alpha-np.de/uploads/images/gallery/2024-03/screenshot-2024-03-26-at-12-10-53.png)
### Scan Ordner auf Server Konfigurieren.
1. Login auf Adminoberfläche -> http://192.168.198.201/wcd/spa\_main.html
2. Adresse Speichern
3. Adressbuch Öffnen
4. Suche nach Funktion filtern nach **FTP**
5. Button **Start** klicke
[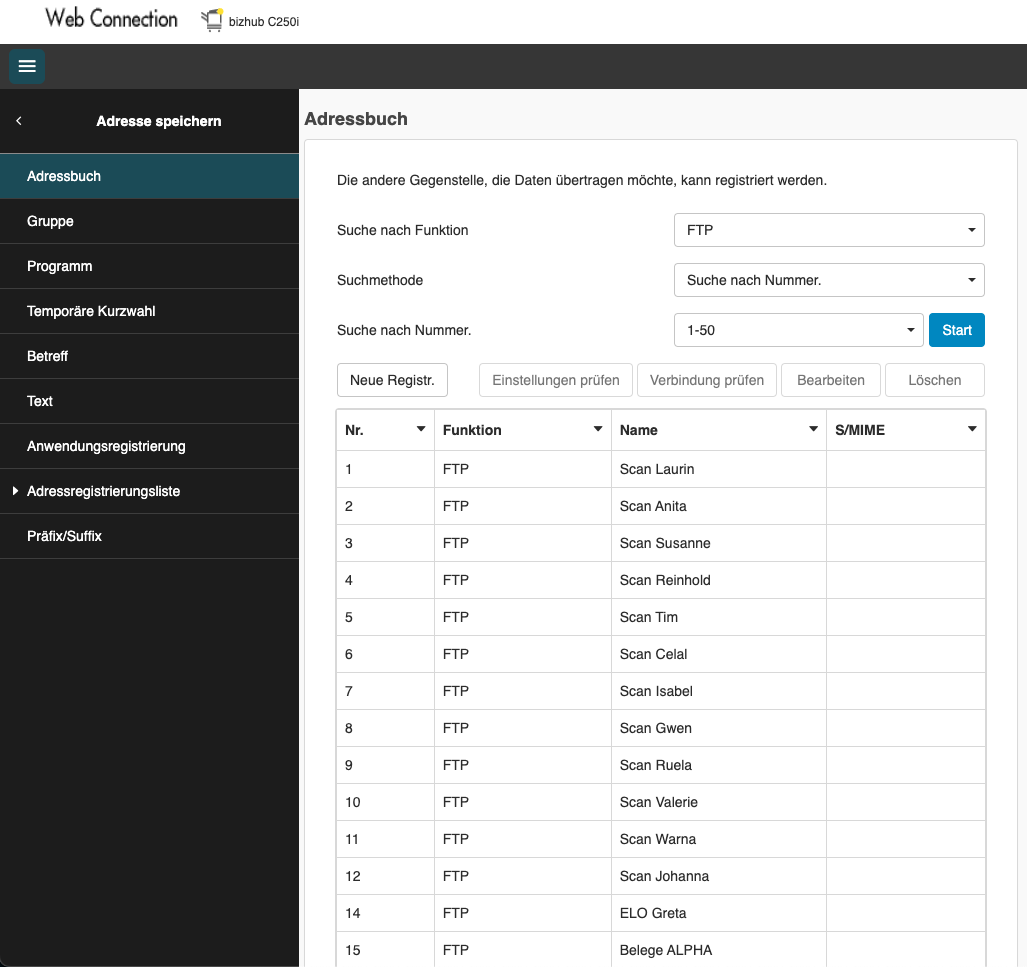](https://docs.alpha-np.de/uploads/images/gallery/2024-08/screenshot-2024-08-27-at-13-26-06.png)
### Neue Adresse hinzufügen/bearbeiten
Scanner User inkl. PWD ist im Bitwarden
IP Adresse 192.168.192.1
Datei Pfad: /BENUTZER/Scanner/ **MUSS VORHER EXISTIEREN**
[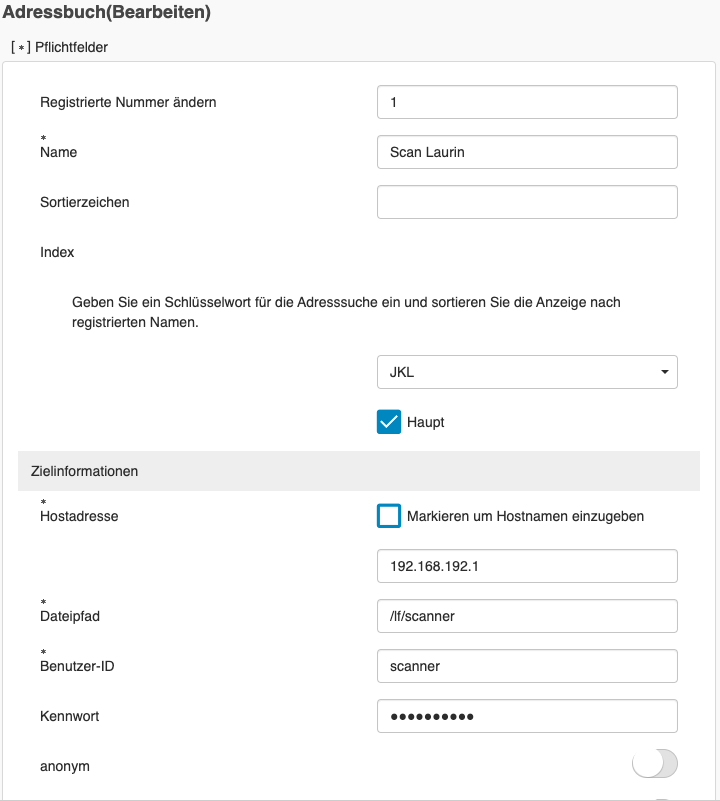](https://docs.alpha-np.de/uploads/images/gallery/2024-08/screenshot-2024-08-27-at-13-27-53.png)